Beginner's Guide to Straw Bale Gardening
Gardening with straw bales is the answer to any organic gardener’s prayers. Suggest your customers try this gardening format if their soil is so poor that extensive amending, or enhancing, it with compost, fertilizers, or leaf mold is their only option. Straw bale gardening can be far easier and less time-consuming.
What is straw bale gardening? Straw bales are used to create raised beds so that additional soil is not needed. Remember that there is a difference between straw and hay, so you’ll want to have straw bales available for your customers.
Choose a Location
To build a straw bale garden, a space that receives bright, full sun is required.
Another consideration when scouting a yard for the best spot is access to water. Once these garden bales are in place, they’re too heavy to move. Placing bales near a water source or within reach of a garden hose makes it easier to tend to them.
Equipment & Supplies for Straw Bale Gardening
In addition to purchasing bales of straw, your customers will need some simple equipment to get their straw bale garden started. For an average straw bale garden, they will need:
- Sheets of newspaper or cardboard to place under the bales
- A hand trowel
- A garden hose (and water)
- Fertilizer — especially bone meal or blood meal
- Straw bales
- Soil or compost if you need to direct-sow seeds
Straw Bale Gardening Instructions
Place a sheet or two of newspaper or cardboard on the ground where the straw bale will be located. The paper should extend several inches beyond the edge of each bale. Then, place a bale on top of the paper. The paper prevents weeds from growing up and into the bale.
Make sure to position the bales properly. Leave enough space between them to push a lawnmower or wheelbarrow through. Once they’re in place, they get heavy when water-logged, and are difficult or impossible to move.
In order to make the straw bales a good habitat for garden vegetables, each bale needs to be conditioned, which turns it into a growing medium. This is the most time-intensive part of the project.
- Days 1 to 3: Once your straw bales are in place, take the garden hose and water each bale thoroughly. Soak it with water. Do this once a day for three days to start the conditioning process. The bales begin to decompose. As the microorganisms start to work, the inside of the bale heats up.
- Days 4 to 6: On days 4, 5 and 6, sprinkle the top of the bale with fertilizer. Sprinkle each bale with one cup of ammonium sulfate (21-0-0) OR half a cup of urea (46-0-0). These are high nitrogen sources, and they also speed up decomposition and conditioning. After sprinkling the fertilizer onto the top of each bale, water it thoroughly into the straw.
- Days 7 to 9: On days 7, 8 and 9, continue using the fertilizer, but cut the amounts in half. Continue to water it into the straw bale.
- Day 10: On day 10 of the process, stop adding fertilizer, but continue watering the bale to keep it moist.
- Day 11 and 12: Check the bale on day 11. If it feels about the same temperature as your hand, which indicates it is time to plant the vegetables. If it feels hot to the touch, water the bale another day and check it again on Day 12. The bale should feel warm, but not super-hot to the touch.
Each bale can be planted with the following number of vegetable plants:
- Tomatoes: 2 to 3 plants per bale
- Peppers: 4 plants per bale
- Squash: 2 to 4 plants per bale
- Zucchini: 2 to 3 plants per bale
- Cucumbers: 4 to 6 plants per bale
- Strawberries: 3 to 4 plants per bale
Lettuce and green beans can also grow in straw bales, but the number of plants depends on the varieties. Check the seed package. Both lettuce and beans grow easily and quickly by direct sowing methods (planting seeds directly).
Use your trowel to dig into the top of the straw bale. Make a hole about the size of the container your vegetable plant came in.
Place the plant, root-side down, into the hole and gently push the straw back into place around the soil and onto the roots. Water it well.
What Not to Plant
Not every vegetable appreciates a straw bale garden. Some do not fare well when grown in straw bales.
- Corn tends to grow too tall and top-heavy for a straw bale garden.
- Potatoes, sweet potatoes, carrots, turnips, and other root crops also don’t grow well in straw bales.
Special Considerations: Tomatoes and Vine Crops
Two types of crops may need additional support: Tomatoes and other vine crops such as cucumbers, squash, and zucchini.
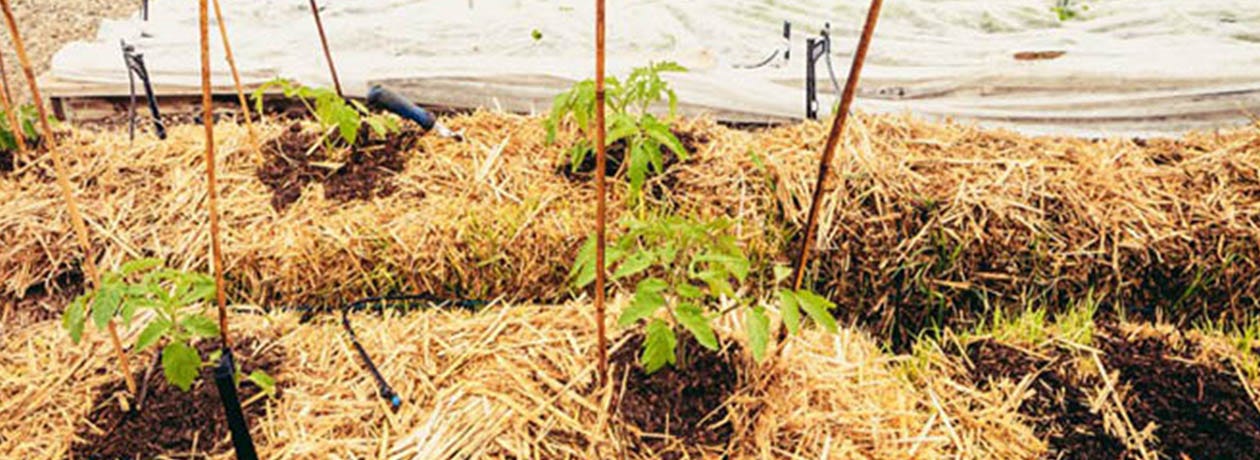
Tomatoes should be staked so they grow upwards and have plenty of air circulation around the leaves. Tomato cages do not work with straw bale gardens. To do so, drive wood stakes directly into the ground. After that, cut old bedsheets into strips and use them to tie the tomato plant to the stake.
For cucumbers or beans, advise the use of “bush” varieties instead of “pole” or vine varieties. Bush cucumbers and beans grow in a low, shrub-like plant and don’t require staking. If you have seeds for pole beans, you can still grow them in a straw bale, but you will need to stake them just as you would a tomato plant.
Cucumbers, squash, and zucchini can spread down, out, and away from the straw bales, and may be a nuisance if there is grass around the bales. Stakes or other supports can allow them to grow upwards instead of down.
Straw Bale Gardening Quick Tips
- Straw bale gardens can dry out easily, so keep them well-watered.
- The straw should hold up through one full growing season.
- Don’t cut the two to three strands of rope or metal baling twine, which holds the bale in its familiar shape.
- Make sure you water your garden every day, except on days when it rains.
- Straw bale gardens should be fertilized every two weeks while plants are young, and every week once they start bearing fruit.
- Nitrogen is the vital fertilizer for straw bale gardens. This feeds the the bacteria so they colonize the entire bale.
Straw Bale Garden Problems
Most straw bale gardens have few problems, which is why they’re becoming so popular. The most frequently reported problem is dry bales. Again, water is the answer. Tell your customers to keep watering — especially during the heat of the summer months.
Another problem with straw bale gardens is mushrooms. Mushrooms are a sign that a straw bale garden is working as it should be — in other words, that it is decomposing slowly. If the mushrooms bother your customers, tell them to pick them off and throw them out. Never suggest they eat mushrooms growing on a straw bale!
Try Straw Bale Gardening Today
Straw bale gardening offers gardeners a great opportunity to try their hand at organic gardening practices without spending a great deal of time or money on soil conditioners. Your customers can scale their garden up or down each year, depending on how many bales they buy and how much growth they want. Best of all, once the garden is done for the year, they can spread the used straw on to their compost pile so that all those nutrients can return to the soil to be used again.